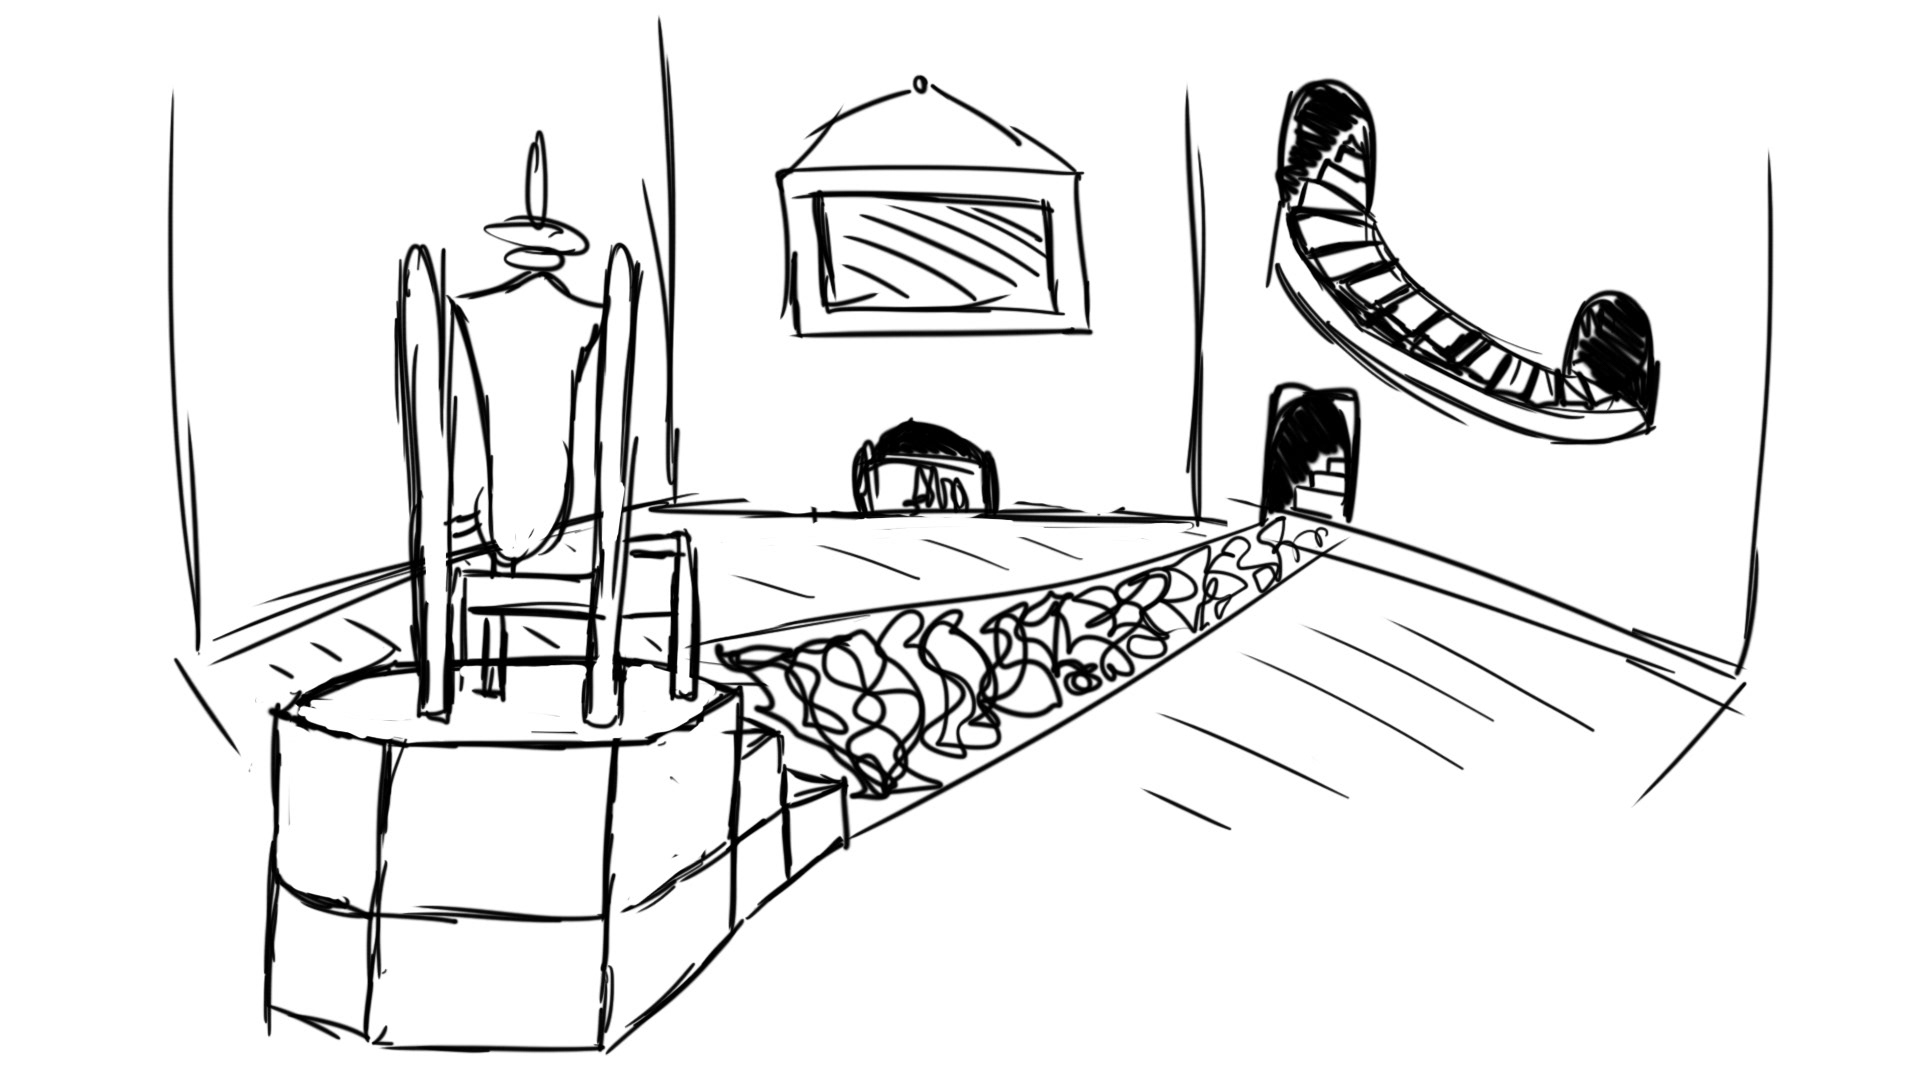
Today I designed what I would like my room design to be, from the brief I have decided to choose, Period Dramas – Regal, historical, re-presentations of the past. This lead me into designing a throne room but to add something different I’ve made it a hidden throne room. . Using the idea of creating a room of a different shape other than a square shaped room. I've decided to go with a more hexagon shape, so that I can include more into the room and they would be easily spotted instead of being more crammed. The element that I want to stand out the most is the throne, as it is the key object that will help tell the story. Adding the fire will add an element of movement to the piece, also some lighting. Including the stairs is showing a different way that the room can be accessed, as the person walks down to the room, as it opens up it can give a glimpse into the hidden throne that yet still stands tall compared to the rest of the furniture included.
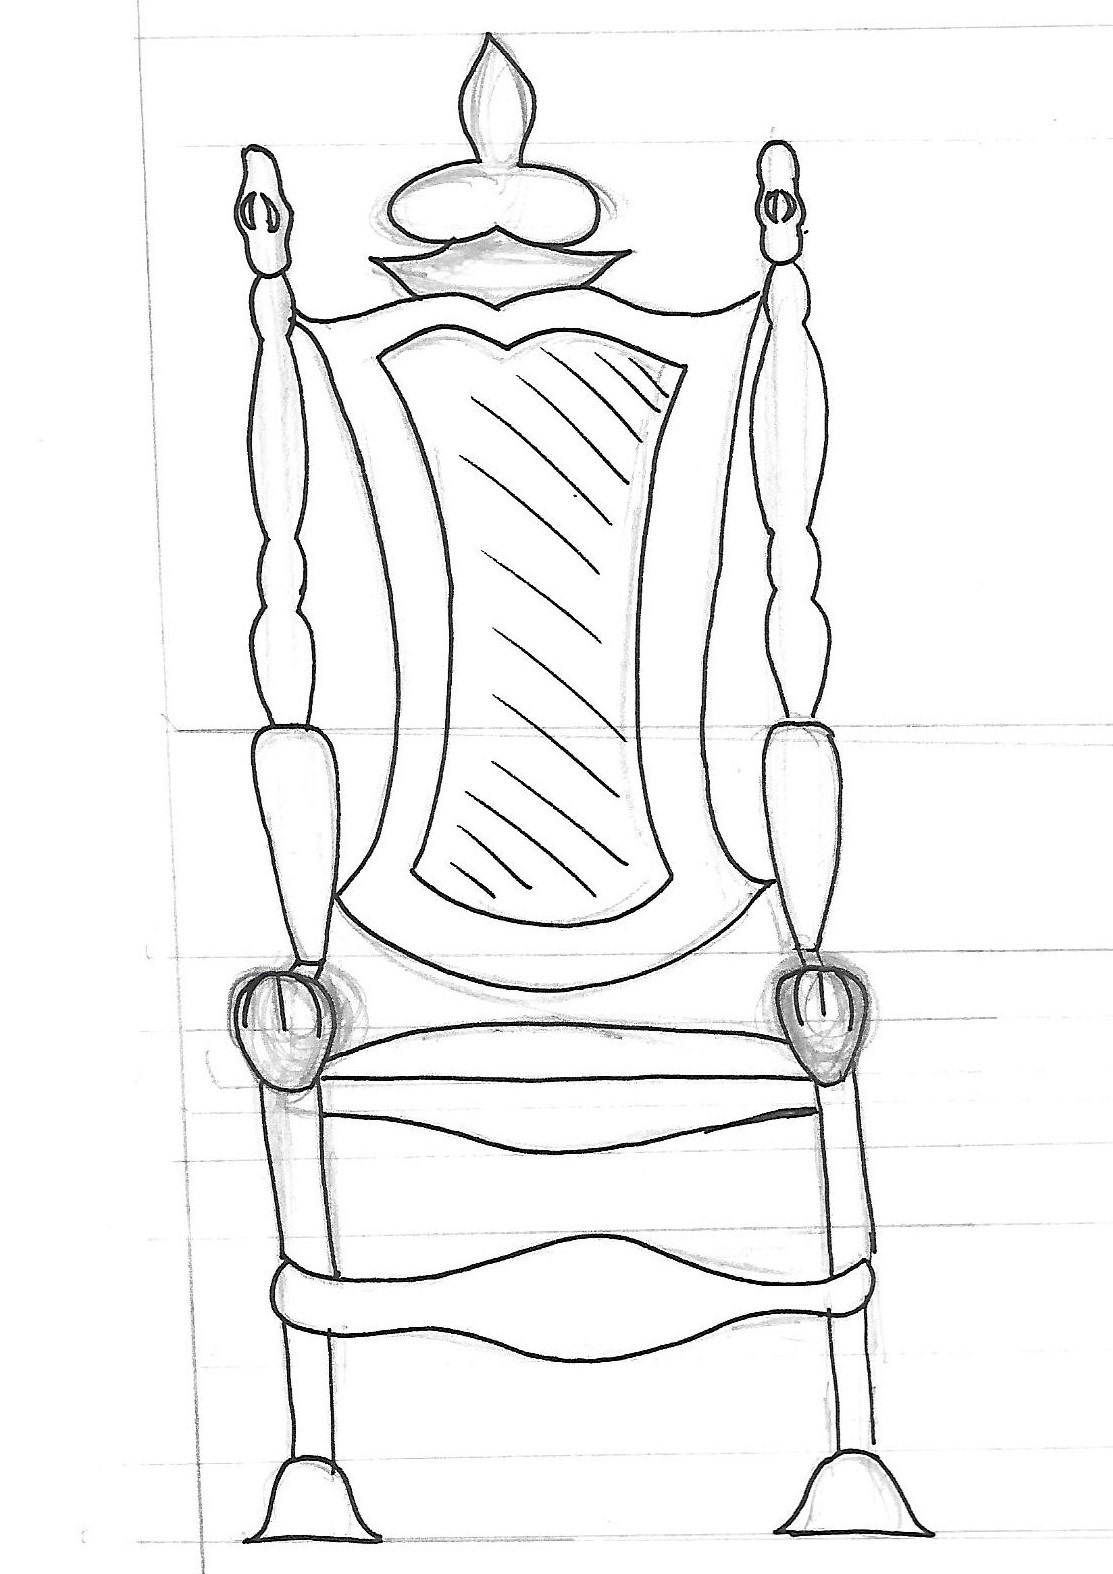
In today's session I decided to design my throne that will then be put into my room design. I hand drew it toward an orthographic drawing because it will help me when modelling it in 3D as it'll give views from different angles that will be very helpful when developing it into 3D. Having drawn is orthographic it helped in creating symmetric lines, that will help creating a realistic piece of furniture that stands straight and tall, the way a regal throne should stand when placed into a room.


These are some pictures taken from the book Classic Architecture in Britain:
The Heroic Age and The Origins of the Gothic Revival.I think that these images
will help me in crating certain elements of my piece. Such as the furniture and
the little details that I will have to add to give the old regal look.


 I created some designs for certain elements that I will use in my room.
A chandelier is something I want to use in my room as it is something seen in
royal furnishing.
I created some designs for certain elements that I will use in my room.
A chandelier is something I want to use in my room as it is something seen in
royal furnishing.


Further developing my design of my throne I made it larger in shape also giving it a more regal look compared to my first 3D design. I like this design more than the first one as it looks like a throne and even though there aren't many details added, I feel as if people would be able to recognise it as a throne.

I made a window for my room as I want the camera to
be looking into the room when the animation starts. It will be a way of
presenting the room before entering it.

To add more to the walls I added some beams to fill
it rather than having it empty.

This is my final design of the throne that I'm
going to include in my room. I decided to make it more of a square shaped
throne as I want it to be wooden. Using two toned wood as shown by the drawing
will help to give it some depth when I come to texturing it.


As it is a throne room, Crown jewels are something that is seen. I decided to add a case that will be filled with a crown, sceptre and orb. Also, I further developed my door. Giving it a more wooden look when I texture it, it will look more realistic and give off the olden time feel to the piece. A sword case is another thing I want to add so I design two that will be soon coloured and then added to a frame hung on the wall.


This is my final design of the crown case. I found it difficult to create the crown in 3D so I created a simple version of my initial design. I like the design used for the sceptre as I was able to add detail to give it a more regal look.

After finishing all of my designs I decided to start texturing my room. After downloading my desired textures, I started to add them to the different elements. I added the textures by assigning a new material to the piece in use or parented object and then proceeded to select either Blinn or Lambert to get a matte or shinier look. After that in the create render node I selected file and then chose the texture that I wanted to use.

For the rug, as I wanted to only cover the top of the object I used planar to select just the top of the square and also adjust the texture to ensure that it fit the shape right and didn’t look of angle.

I feel like one of the most important textures I used was the wall, using a marble brick I feel this gave a regal look but still looking as if it was created in the past. I think it tied the entire room together.

I decided to create my animation which consisted of the picture frame falling from the wall, off the fire place and onto the floor. I decided to add a bounce as it fell to give it a realistic look as it falls. I initially struggled with timing, the frame would sometimes hover through the animation but with some editing I managed to have a fall that flowed and fell at a speed a picture frame would.
When it came to rendering I didn’t
have much knowledge about it. I worked out the options that was needed, such as
choosing the number of frames that needed to be rendered which is 1-225. Also,
I had learnt that choosing a lesser quality would result in shorter render
time. I choose the quality of 640X480 which would result in a good picture,
this was primarily supposed to be a test render.
Had I have known previously how long
it would’ve taken to render an animation I would have given it more time that
what I had given to be able to do the test render as well as a final render at
the quality of HD_1080. The next time I create a 3D animation I will ensure to
leave a sufficient amount of time to create a render that can reach a better
quality of video.
Overall, I feel as if I have achieved
a very well-presented 3D animation. I am proud of myself, as I started with a
very limited knowledge of 3D but still I created a finished piece with finished
texturing and a render to present it. The next time I create a 3D piece there
are things I wish to improve on such as some modelling skills that I couldn’t
achieve with objects like the crown. However,
the final piece is a great achievement for myself and I feel as if I have
learned and comprehended a lot about creating a 3D project.
Comments
Post a Comment